If you used Yeoman, Grunt, and Bower before then you would be familiar with this process. If not, click on any of these names to find out a bit more before continuing to read this article.
A bit about YeoPress before diving in:
YeoPress is a wordpress generator by the genius Wesley Todd. Thanks to him you a get the famous 5 minutes install wordpress customized with all the bells and whistles you’ve probably dreamed off integrating to your custom wordpress project.
- WordPress as a GIT submodule ( a great vcs for your keeping tracks of the project development)
- Grunt tasks preconfigured
- Regarde (grunt-regarde)
- Live Reload (grunt-contrib-livereload)
- Sass (grunt-contrib-sass)
- JSHint (grunt-contrib-jshint)
- Bower (grunt-bower-requirejs)
- RequireJS (grunt-contrib-requirejs)
- And more custom and advanced configuration that I mostly don’t understand, so you shouldn’t worry about as well
Now enough talking where is the code stuff:
Open up your terminal
Once npm installed you could run:
$ npm install -g yo generator-wordpress
Let it run to install all the required packages and then run:
$ yo wordpressIn the mean time you will need to install your local server in order to develop and test your wordpress site before deployment
If you are a mac user I strongly recommend installing MAMP and windows users could do with XAMPP or there are tons of other options out there which you can choose from
MAMP stands for Macintosh, Apache, MySQL, and PHP. It allows you to run a local server on your machine to easily work and test your PHP and MySQL database before going live.
I’m a mac user so will go through setting it for mac but click here to get the set up for windows users
Get detailed install from source for mac users click here
Once downloaded, click on the .dmg file to run the install and add it to your dock so you can have quick access to it. Open it, go to preferences, leave Ports to default and the rest just put your preferences but on the web server tab make sure you select your document roots correctly to where you want to project to be served on and make sure you are selected on Apache web server.
Once this is all good, just go ahead and click on Starts Servers.
Now let’s go back to your terminal window, the install should be done by then
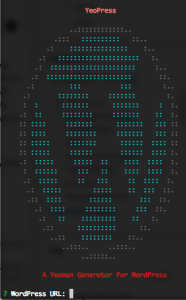
You should see a screen like that
 Go ahead and fill out the prompt:
$ WordPress URL: http://localhost:8888
$ Table prefix: wp_
$ Database host: localhost
$ Database name: wordpresstest
$ Database user: root
$ Database password: root
$ Use Git? Yes
$ Would you like to install WordPress as a submodule? Yes
$ WordPress install directory: wordpress
$ WordPress content directory: content
$ Install a custom theme? Yes
$ Destination directory: yeopress
$ Theme source type (git/tar) git
$ GitHub username: wesleytodd
$ GitHub repository name: YeoPress
$ Repository branch: template
$ Does this all look correct? Yes
Then let it run and go back to your MAMP application and click Open WebStart page > go to tools tab and select phpMyAdmin
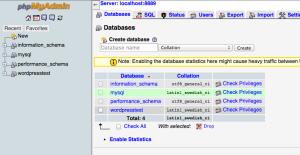
Select the database tab on the top and create a database called wordpresstest
Go back to your terminal and make sure the install is done.
Then go to your browser and put http://localhost:8888/ in the address bar, this will lead you to your installation page just fill out name email password and the tadada you get your home page
Then go the dashboard to start making changes by going to this address http://localhost:8888/wordpress/wp-admin/
Go to appearance > themes on the left side and select Yeopress theme
Now the fun begins start customizing your theme to your liking.
To get more in depth with this go the next tutorial
[Coming soon]

